Tuesday, December 31, 2013

2013 Brew Year in Review

2013 was less post-worthy than the first annual installment of this blog.  Partly, because I changed the overall direction of the blog to focus more on my beer and creations and less on the craft beer industry and informational side of the hobby.  I also decided to post the recipe, brewday and tasting note as one post rather than individually as I felt it provides the reader with more resolution and/or less anticipation.  Additionally, some life events took much more of my free time than expected.

In 2013 I only made 6 batches, and one of them was a 2.5 gallon batch, tallying up to around 27 gallons of malty beverages.  My favorite beer of the year was easily the Wrong Coast IPA, which I will need to recreate or brew something similar soon.  I also was very pleased with how my second lager, Durstlöscher, came out.  My favorite label of the year would go to my most recent beer, Just an Udder, a milk stout which was inspired from Mrs. Shegogue Brew's creative mind.  I will say, although my quantity went down in 2013, the quality was very high standards.  Ever since I started homebrewing 4 years ago it seemed like every other batch would result in an imbalance or off flavor.  I think I was pretty successful at removing off flavors in 2012, and in 2013 I also was able to prevent any balance inconsistencies - you know, create a beer that was too bitter, or thin, or sweet.  Partly this was due to going to back to some tried and true recipes, but it was more so attributed to keeping an eye on my OG and evaporation rates to make sure my hopping rates matched by sugar content, and obviously, providing a healthy fermentation.

Outside of actually making beer I increased my social interaction in the hobby.  For a while, other than my best friend  (who also is my number one taste tester), I was kind of a loner in the hobby.  Sure, I participate regularly in only forums like Homebrewtalk.com, but that is the internet, not real live social interaction.  I connected with a friend colleg who I knew had also taken up the hobby and we traveled to the National Homebrewer's Conference together.  It was an amazing time and we were able to learn a bunch and meet fellow brewers.  I also met a group of friends through the BJCP Tasting Class I took.  Most of them already knew each other from the local homebrew club (which I always seem to miss the meetings for and therefore have not yet joined - 2014 resolution!?), but they were very welcoming and provided another resource and friendly outlet for me to grow in this hobby.  I am still anxiously waiting on my scores from the test I took on September 29th!

So as I sit here reflecting on another rather successful homebrew year, I would like to offer you and yours a very Happy Brew Year!

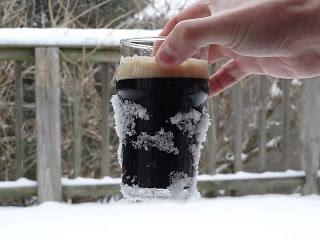
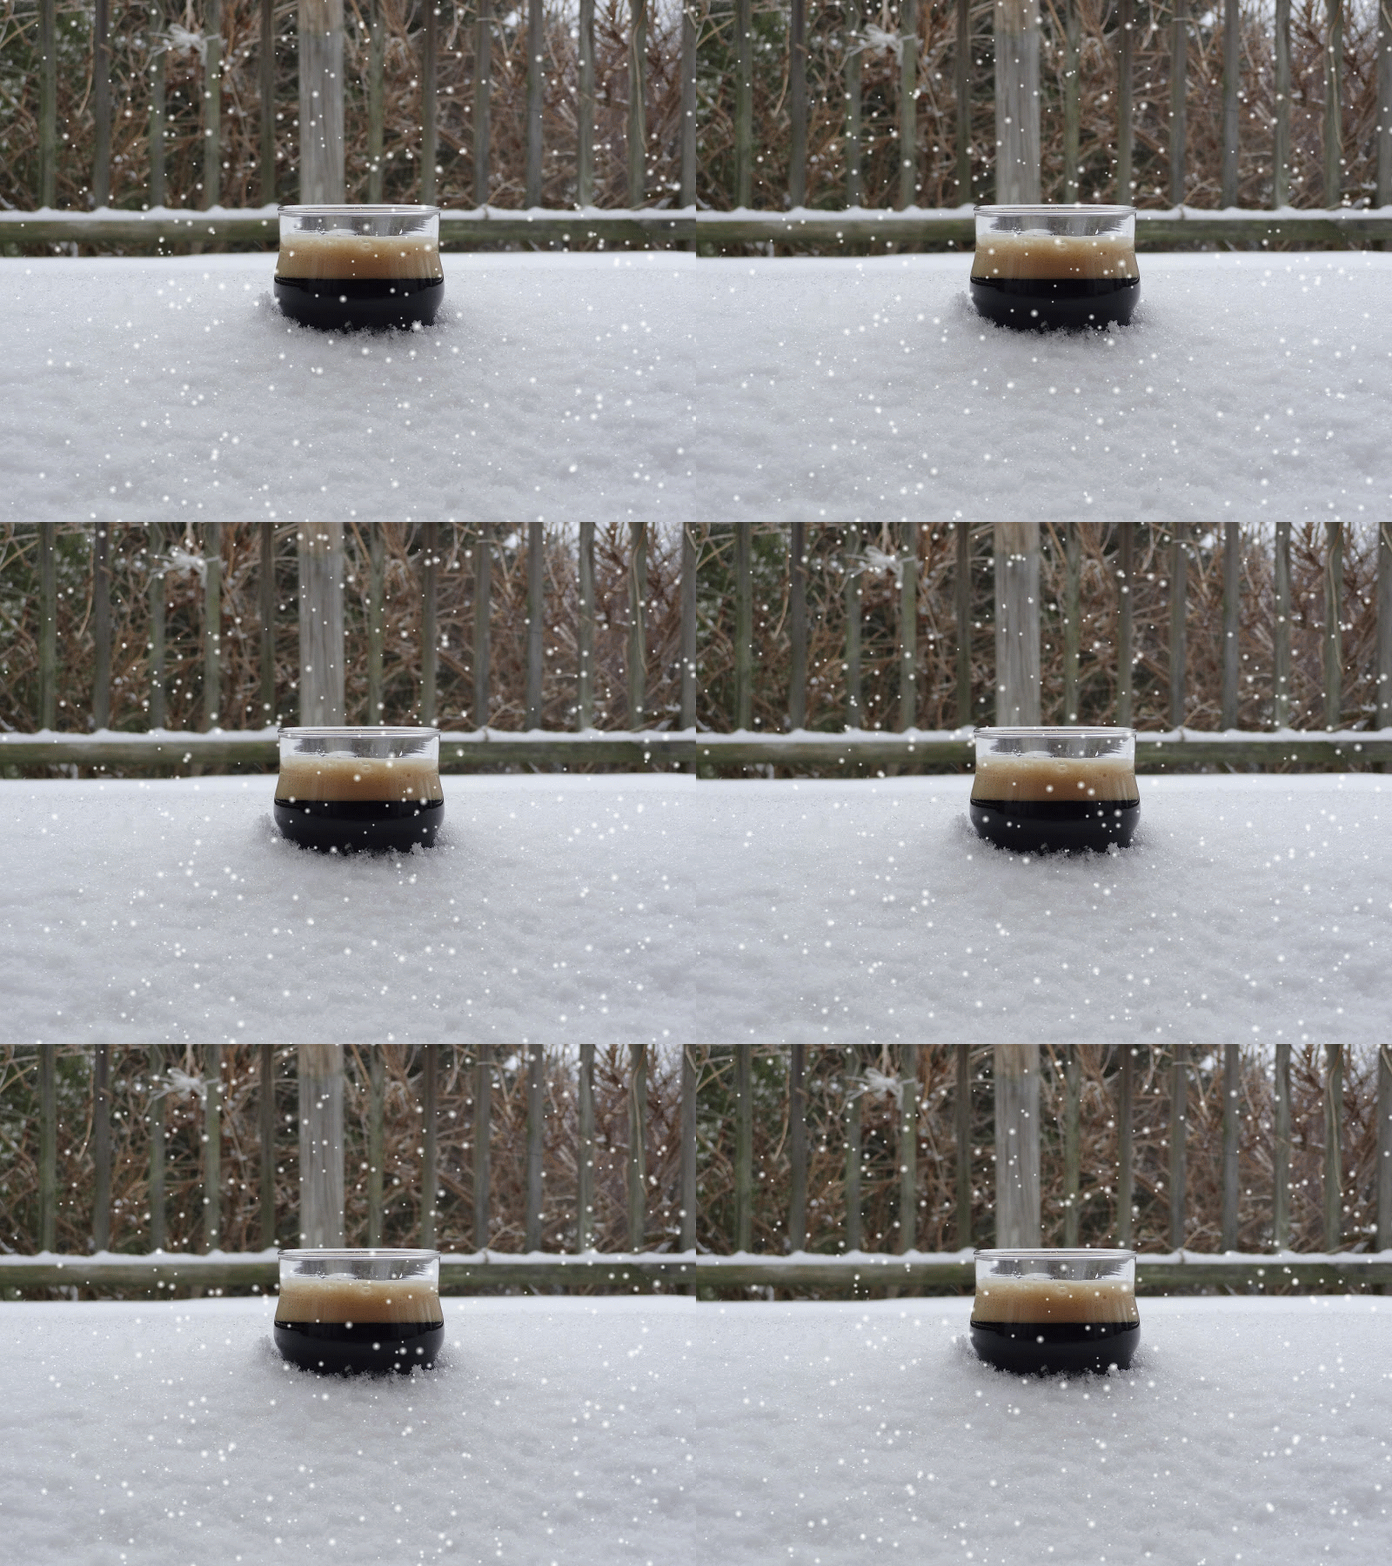
Snow picture
(Went looking in picasa web album for picture and saw that google had added a snow animation to this one so I decided to included it!)


Cheers!

Sunday, December 8, 2013

Just an Udder - Milk Stout

I brewed this beer on Columbus day, which I had planned to take off work as a floating vacation day, but was actually forced to because of the government shutdown.  It was the second beer I had made during the shutdown and third beer brewed at the new house.  The brewday went rather smoothly.  I did my standard infusion mash with a 45 min rest - I have been doing this a lot recently to try and make my brewday's quicker.  I went with 153 degrees since I was using the less attenuative WLP002  English Ale yeast.  I was adding a new piece of equipment to my setup: a smaller 9 gallon stainless steel bayou classic kettle.  This kettle worked out nicely as it is narrower and is part of equipment upgrades I need to get into the induction electric brewing setup I am always writing about but never making happen!  So without further ado, I present to you Just an Udder.


Milk Stout
Just an Udder - Milk Stout


Just an Udder

Brewed On: October 14, 2013
Kegged On: October 27, 2013
Style: 13B - Sweet Stout
Batch Size: 6 gallons (5 gal into fermenter)
Efficiency: 80%
OG: 1.060
FG: 1.028

IBU: 29 calculated (Rager) 
ABV: 4.3%
Yeast: WLP002 from Pumpkin Beer slurry Fermented at 62° for 4 days then rise to 67°

Grist Mashed at 153 for 45 minutes
74% - Maris Otter (Muntons) - 9.5 lbs
8% - Black Malt - 1 lb
8%  - Lactose sugar -  1 lb - added at 5 mins to the end of the boil
6%  - Crystal 80 - 12 oz
4%  - Pale Chocolate - 8 oz

Hop Additions 
0.50oz - Magnum 14.7% AAU - 60 minutes - 29 IBUs


Water Adjustments
Montgomery County, MD Water - 1/2 Campden Tablet for all brewing water
5 grams gypsum to mash water
5 grams CaCl to mash water

Tasting Notes
This stout pours a deep black with dark brown highlights when held up to the light.  It is topped with a very dark and moussey tan head which remains as a coating while you drink - excellent lacing.  The aroma has a moderate roast character which is dominated by chocolate, but has low notes of coffee and licorice.  There is a moderately low sweet note which is partially caramel, but also sweet cream, which is indicative of lactose.  An overall aroma descriptor one could relate to is milk chocolate.  The beer has moderately low hop bitterness and no apparent hop flavor.  The flavor profile of the beer is less milk chocolate than the aroma and more like a sweetened light (breakfast blend) coffee.  The malt and lactose sweeteness is nicely balanced by the roasty notes, which lead to a slightly sweet finish. The mouthfeel is comprised of moderate carbonation, medium full body, and moderate creaminess.  This beer does have a low astringency from the dark malts, but it is not displeasing and prevents the beer from being too sweet.
Milk Stout In the Snow


Milk Stout - With snow on glass

The pictures taken today after the little snow storm we had were very fitting.  This is a tasty beer, and went really well after my hours of shoveling!

Sunday, October 27, 2013

My First SMaSH - Simcoe and Maris Otter

I finally got a chance to brew on Labor Day weekend.  I unfortunately had not spend to much time into recipe formulation so I decided to use what I had on hand to make a Single Malt and Single Hop (SMASH) beer.  I used the base malt I currently have on hand - Munton's Maris otter.  I chose to use Simcoe for the hop as I was a big fan of Uinta's wyld, which is majority Simcoe.  Brew day was fairly smooth other than having to run back and forth from the back porch into the basement for various brew day gear.


Mr. Mo Simcoe Label


Brewed On: September 1, 2013
Kegged On: September 21,2013
Style: 10A - American Pale Ale
Batch Size: 6 gallons (5 gal into fermenter)
Efficiency: 77%
OG: 1.047
FG: 1.010
IBU: 39 calculated (Rager) 
ABV: 4.8%
Yeast: Safale S-05 American Ale Yeast.  Fermented at 64° for 3 days then rise and held at 68°


Grist Mashed at 154 for 45 minutes
100% - Munton's Maris Otter - 10 lbs

Hop Additions
.5 oz - 
Simcoe  - FWH - 28 IBUs
1 oz - Simcoe - 10 min -11 IBUs
1 oz - Simcoe - 0 min
Dry Hop Addtion of Simcoe
1st Addition - 2 oz ~9 days (ran out of CO2 so it stayed in longer than planned)

Water Adjustments
Montgomery County, MD Water - 1/2 Campden Tablet for all brewing water
12 grams gypsum to mash water
5 oz acid malt


Tasting Notes

The aroma has a moderately high and complex citrus which is a combination of sweet orange and grapefruit with a hint of a more sour citrus fruit - think lemon/lime.  There is a low bready quality from the malt, but the hops are the star. Light gold in color and clear, just shy of brilliant, with a fairly thick white head that fades fairly quickly to a coating on top.  The flavor contains a moderate bready malt character and moderately high grapefruit/lime citrus hop character.  The moderately high hop bitterness is a tad too much for the malt backbone which leads to a decidely balance bitter balance.  The beer has a moderate carbonation and a medium light body.  The beer finishes slightly dry.  

Overall, it is a very drinkable beer and coming in at 4.8% is very sessionable.  For hop heads this is a solid pale ale, but is definitely too bold for the BJCP determination of APA. After doing my first SMaSH, I think simcoe is a great hop which can contribute a complex citrus character to beers, however, it needs the synergy of other hops to produce a great beer.  I guess the sour citrus fruit I perceive is what others attribute the "catty" quality of simcoe and although I kind of like it, I can see how it would deter others.  The maris otter malt does a good job against the highly hopped competition, and I think a standard american 2-row would have made this beer even more of a hop star.  It provides a depth and I believe mouthfeel the 2-row just cant compete with.

Monday, October 21, 2013

BJCP Tasting Exam

I have been rather quiet over the past couple months.  Partially due to the new house, but a lot due to my beer-based hobby time being devoted to studying for the BJCP Tasting Exam.  I knew fairly quickly after entering two different competitions in the summer of 2011 I would want to become a judge.  I received scoresheets back from the two competitions with a 29 and and a 38 for the same beer - a Scottish 70/-.  In the one competition I didn't place at all.  In the other, I received 2nd place Best of Show.  This is not the first time this injustice has happened to a homebrewer, and I am sure it won't be the last, but I knew I wanted to become a well-qualified judge and do my part to prevent this!

I looked at the BJCP exam schedule and found out the closest exams to me where held a few miles north in Frederick, MD.  In April of 2012 (10 months out), I contacted the exam organizers to get into the exam in February of 2013...it was already full and I was placed into the 12th spot on the waitlist - Wow!  I knew you had to sign up early, but didn't realize it needed to be that early.  I was then informed another exam would be administered in September of 2013 - I signed up.

Fast-forward to this spring and the organizers contacted everyone and let them know of a tasting course they teach to prepare people for the exam.  The class was 12 weeks long, meeting for 2 hours once a week.  We went through all of the BJCP style guidelines trying a dozen or so beers at each meeting.  The teachers also graded sample scoresheets for us and halfway through the course we took a practice test.  We had a few "flaw" sessions which were critical as I came to learn that some of the descriptors for a certain off-flavor were not the tastes I would natural associate.  For example, DMS to me tastes like regular V8 tomato juice.

BJCP Entrance Exam Certificate
Entrance Exam Completion Certificate


As you can see above, I passed the new online entrance exam - required before you can take the tasting test.  I took the tasting exam the last Sunday in September and was pleased with how I think I did.  After the exams were handed in, the proctor told us the judges consensus scores and what beers we had.  I was only 5 points off the judges consensus scores at worst, and one of my beers was within a point and a half!  Being the nerd that I am, I looked up the scoring guidelines and it looks like my scoring should average around 16.8 points in the scoring accuracy part.  16-17 points on scoring accuracy is required for a "National" ranking.  I figured this will put me fairly close to the score of 80 which is what I am striving for as this score will make me eligible to take the written exam (after accruing the necessary judging points) and to try to become "Nationally" ranked.

Now I just have to wait for the exams to be graded.  This will take a couple of months as it is all volunteer based and a very time intensive process.  In the meantime, I can get back to brewing! 

Thursday, August 8, 2013

Planning my Indoor Electric Brewspace

Back in March of 2012, I discussed brewstands and recirculation mash system as 'wants' in part 3 of my all grain series.  They are still on my wants list, but with the new house I have decided I need to enact a plan to get indoors for brewing, with electricity.  Too many days where my hands are freezing from cleaning my mash tun out in the cold.  Additionally, we do not have a garage so I would be out in the full elements for brewing.  Below I will go over the pro's and con's of having a dedicated indoor brew setup and then layout my 3 phase plan to get indoors and use induction!

(New house - want to brew INside it, not OUTside it)
 

PRO's of Dedicated Indoor Brewing

  • Weather - Indoors you can be the postman of brewing - rain, sleet, snow, extreme heat, extreme cold - it doesn't matter.  This is the best reason for indoor brewing and could possibly outweigh any of the cons in and of itself.
  • Dedicated Brew Area - this isn't necessarily only specific to indoor brewing, as having a brewstand on casters would classify.  But having a dedicated space for brewing, you can organize and optimize for an efficient and quicker brew day.
  • Operating Cost - Brewing with electricity is far cheaper and more efficient than propane.  Also, as long as you pay your electric bill you will not run out of fuel - unless there is a power outage.
  • Proximity - Depending on where you setup your indoor brewing you should be close to hot water, and a sink/cleaning area, maybe even a T.V. or bathroom!

CON's of Dedicated Indoor Brewing

  • Initial Setup Cost - To do 5 gallons or more you will need access to 240v electricity with GFI, Ventilation etc.  Also if you want more advanced mash system you will need to spend quite a bit in the electronics department for a control panel.  This is probably the biggest hindrance to going indoor.  People can spend thousands of dollars getting a dedicated brew room - check out theelectricbrewery.com to see what i mean.
  • Ventilation - Boiling off 1+ gallons of liquid will create quite a humid environment.  You will need to have some sort of ventiliation to keep the area in and around your brewery dry and free of mold.  Additionally, some family members may not appreciate what I think are wonderful smells of wort and hops.
  • Mobility/Portability - You are kinda stuck to a location with the appropriate power you need.  It will be hard to take your system to club brewing event which is outdoors.
  • Electric knowledge - If you don't already know, you will need to learn a little bit about wiring electricity and electronics OR pay big dollars  to buy a prefabbed setup (see con # 1)

Shegogue Brew's Indoor Electric Plan

  • Frugal - Anyone who knows me knows I love a good deal.  I will DIY whenever I can to save some $$$.
  • 1) Electricity First - The first part of the equation is getting adequate power supplied to the unfinished side of the basement.  This needs to happen anyways to be able to run my keg fridge and ferm chamber - there currently are no power outlets on this side of the basement.  While at it, I will have the electrician wire up power for the brewspace
  • 2) Simple Setup - Once electricity is in place I will be going with a 20a/240v 3500watt induciton cooker.  This removes the need of a control panel, PID's etc.  I will brew in the same manner I currently do outside just with induction rather than propane burner.
    • Vent Hood - I will construct some sort of a vent hood and wire up a 6" inline fan to run the exhaust outside - all DIY, all savings
    • Brewstand - will construct a simple 2-tier brewstand to utilize gravity (as I currently do)
    • Gravity fed MLT

  • 3) Automated Mash Temp Control
    • Add a 15a/120v RIMS or "teakettle" type HERMS system.
    • This will require fancy pumps, and a control panel
    • A lot of extra hardware for installing valves into kettles
Step one should be completed sooner than later. Hoping to be able to jump into step 2 after the Xmas season (hint to santa).  And Step 3 will be a year or two out, maybe longer - really need to rebuild our deck.  As long as I am inside, I think I will be a real happy brewer :)

Monday, July 29, 2013

New House, Planning Inaugural Brew

As previously mentioned, Mrs. Shegogue Brew and I bought our first house recently.  The previous owners were smokers so we had to do a lot of painting, wall washing and needed to replace carpet.  While at it we decided to take down a wall between two extremely tiny bedrooms (they barely had space for anything other than a twin bed) and extend the master closet into one of the stated bedrooms - resulting in a good sized 2nd bedroom and a generous walk-in closet off the master.  It was a lot of work and we crammed it all into a 3 week time period. I then went to NHC and then Las Vegas for a friends wedding.  This past weekend we had a housewarming party, which officially marked the completion of all of our hard work!  There is still a bunch of other stuff on the long-term house to-do list, but I finally have a chance to get to the all important beer to-do list!


Currently, I'm tapped out!  The last beer I made was the German Pilsner which was brewed back in February.  I wasn't able to keep stuff cold during the move or after, and the beers I had just did not hold up with the temperature fluctuations and general age (over 6 months).  Additionally, the new house is lacking power receptacles in the dedicated brewery area.  I currently am running an extension cord from the other side of the unfinished basement to power my kegerator as a stop-gap until I can get electrical installed.

I hope to brew this upcoming, but I need to do a bit of planning.  Brewing in a new space always presents some challenges so I will use the rest of this post as a checklist to help identify and remediate any potential problems in advance to make the brewday go smoother.

New Brew-Space Checklist!

  • Weather - Until I can get the all electric setup going inside of the basement (monetary donations welcome!), I will be back catching some sun in the great outdoors for my brewing (no garage at the new house).  While this isn't a huge issue, weather was something I had conveniently forgotten at my rental due to the garage.  If its raining I may have to postpone things.
  • Utilities (Water and Fuel) 
    • Where will I get my brewing water from? - I don't have a potable hose, so it looks like I will need to fill up carboys in the kitchen and lug it downstairs and outside for my mash and sparge water.  There is a spigot for chilling and cleaning water outside already, so that will make clean up easier.
    • Do I have enough propane? - I have one tank that is low and a mostly full one connected to my grill.  I should have enough for a brew, although there may be need of some regulator switching
    • Electricity - Sometimes I use a pond pump to recirculate icewater through my immersion chiller to get temps down into the 60s.  I hope my extension cord reaches!
  •  Salts, Cleanser and Sanitizer
    • Do I have all necessary mash salts? Need to check on this one, think I have gypsum, CaCl, and campden.  Should be all I need as long as I have acid malt, which i think I do.
    • Do I have enough cleaner? - I know I am low on PBW, and I will most likely need to pick some up.  I know i always have some C-Brite from my first kit I never used in a pinch.
    • Do I have Sanitzer - Luckily, I know i have an ounce or so of Star San left, as well as an unopened 8oz.  Good to go here!
    • Random items - I think i need more fermcap-S as it has been out of the fridge for 3 months
  • Brewhouse Tools - Are all thermometers and refractometers calibrated? Are my scales accessible?  Are houses/racking canes clean - maybe I should just "snap myself off a fresh piece!"
  • Recipe/Ingredient
    • What style and what recipe? - This is always a big question mark if I havent brewed in a while.  Inevitability it will be something of medium to low ABV and leaning towards the hoppy side - maybe that session IPA I have been dragging my foot on!
    • Do I need ingredients I don't have in stock? - Once you have your recipe, make sure you have all the ingredients for it.  I have had my yeast sitting at room temp for 3 months.  The dry yeast is probably ok, the liquid yeast most likely is very low of viability.  May need to pick up yeast based on recipe.
  • Fermentation Control - This is usually not a problem, but because of the move and my lack of power, I will need to figure out how I am getting power to my ferm chamber.  I may need a new extension cord if I can't determine how much power is available off of the circuit the current one is on.
Anything I missed? Be sure to let me know in the comments below.

Wednesday, July 3, 2013

35th Annual National Homebrew Conference - Recap - Philly 2013

A while back I posted I was one of the lucky few to secure tickets to the AHA's 35th Annual National Homebrew Conference 2013 in Philadelphia, PA.  It was an amazing event and a "must" for any homebrew fan at least once in their lifetime.  For anyone who has not been, or even those who have, I hope to document a slice of my 4-day experience for you to enjoy. I will break it down by the major events and throw in some other tidbits of info here and there.

NHC 2013 Brewing Up a Revolution

Seminars

The Conference is a two-headed beast: learning and partying.  The first head, at least for me, was the real "meat & potatoes" of the conference .  I love learning new things about this hobby and absorbing information which will increase the quality of my beer.  There were somewhere around 36 different seminars given over the course of 3 days, which were broken down into different sessions.  You had to pick and choose which ones you wanted to attend, but luckily they will be posted online to AHA members later so I can listen to any I missed. I will share with you my five favorites from what I attended.
  • Stan Hieronymus - Because Not Every Beer is Stone Enjoy By IPA: Preserving Hop Aroma: Stan is man when it comes to hop knowledge.  He has written a book on it, but he is constantly researching and keeping tabs on the most recent hop informaiton out there.  If anything, this talk basically alludes to the fact that we currently know like 5% to 10% of all there is to know about the hop and how yeast, and fermentation affect the crop in beer.  This is an aspect of beer, especially hoppy ones, that still has a lot room for expansion.
  • John Gasparine - Alternative Wood Aging Techniques - John has collaborated with some of the most recent wood age beers crafted by Dogfish Head and Heavy Seas.  There were quite a few jokes surrounding the sexual connotations of the word 'wood,' but it was pretty unavoidable as I got excited from talking about this topic, too!  Some really good pieces of info I took from this seminar in regards to wood aging beer was to measure your wood by square inches per gallon.  This will help the brewer be able to produce repeatable results in future batches - weight is not the best measurement.  The second is through John's research, he finds that the first 3 weeks of aging a beer on wood really produces a lot of harsh tannins - but DO NOT fear!  After 4 weeks, the tannins drop out and the wood flavor really starts to come through and mellow with the beer.
  • Mitch Steele - Current Techniques and Recent Developments Used for Brewing Great IPAs - Being served the Enjoy by IPA by Mitch at Pro-Brew night was pretty awesome - there was a twinkle in his eye as I gave a hearty "THANK YOU" to him after receiving the beer.  Mitch glazed over his slides to really talk about and discuss some of the research Stone has done in evaluating new hop varieties.  He made some good points for potential commercial brewers - don't make any beer heavily focused on one hop or ingredient.  If this ingredient becomes scarce it will cause problems with replicating the beer in the future.  He also discuss the best practices on dry hopping amounts and contact time - which some researching is pointing to 1-3 days tops!
  • Josh Weikert - Brewing with Induction - Josh is the President of the Stoney Creek Homebrewers club, a pretty decorated bjcp medalist, and one of this years conference local committee organizers (I think?).  He gave a great talk on using induction burners for easy indoor brewing.  This is a system I had been researching for a while, and this talk just reassured it is the direction I want to go for my brewery.  Some proponents for this system is decreased evaporation rate.  This also results in less steam, which Josh claims he does not even need a hood to take away moisture (still a little skeptical about this).  He also states that because of the power limitations, his maximum capacity allows him to walk away without fear of boil overs.  Look for more on induction brewing from me as I look to move to smaller batches and brewing indoors!
  • Michael Fairbrother - Mastering Mead - Michael, who is the owner of Moonlight Meadery, gave out a ton of mead over the conference.  It was actually my first samples of mead, and all can say is "wow."  His mead is absolutely amazing.  This session, unfortunately, did not provide a whole lot of technical info on how to make it - was more 60 minutes of how much of a badass he is, but I think it definitely sparked a lot of brewers interest in mead (if they weren't already)
Stone Enjoy By
Stone Enjoy By

Social Events

The other part of the conference were the nightly social events, although there were other social events throughout the day at the product expo and ongoing "social hall," the following were the "main events."

  • Pro Brewer's Night - Thursday Night - Everyone at the conference headed over to  Convention Center (luckily this traverse could be made entirely undercover, as there was lots of rain!) to sample beers from 25+ commercial breweries.  I was grateful for the pretzels, nuts and water provided by the convention center - without these salty treats to absorb and the water to rehydrate, there would be (more) hungover brewers than usual.  The only disappointing thing about this event was that half of the beers offered were IPAs or Pale Ales.  Don't get me wrong, I love hoppy beers and Stone's Enjoy By was AWESOME, but I was hoping for more variety.  I found some malty offerings by Yard's and Troeg's - 2 PA local breweries.  I also found it by getting my first taste of Moonlight Meadery's 'Desire.'  Other notable events of the night was the beer fountain provided by Laguanita's - I was a few rows over, but I saw a streaming fountain of beer geysing about 25 feet into the air, followed by raucous cheering.  Afterwords, my friend and I turned into bed so we would guarantee waking up in time for seminar's the next day.
Moonlight Meadery
Moonlight Meadery

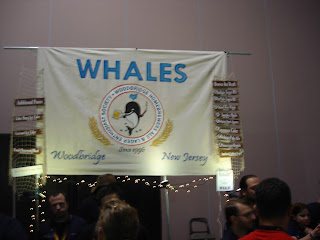
  • Club Night - Friday Night - I think this is event everyone looks forward to because you get to try the best beers all the homebrew clubs have to offer.  Each club also embraces a theme of some sorts to make their booth stand out.  Some of the costumes were way over the top and awesome, other clubs lacked in the costume dept, but definitely redeemed themselves in the beer dept.  I was able to try some truly amazing beers not limited to the likes of Palo Santo Aged RIS (WHALES), a great Oatmeal Stout (Brew Free or Die), an IPA through a randall of chinook (tasted almost like watermellon from ), a Strawberry IPA (some random guy drunk guy from jersey), and a handful of delicious sour beers.  I also like the fact that the Maryland homebrew clubs all were placed in the same corner and collaborated for a raffle - had to sample a beer from each club to enter.  A little after 11pm we were kicked out and forced to move things back over to the social well in the Hotel. 
FOAMs Booth
FOAMs Booth

WHALES booth
WHALES booth


Baltibrew's Booth
Baltibrew's Booth
C.R.A.B.S. Booth
C.R.A.B.S. Booth

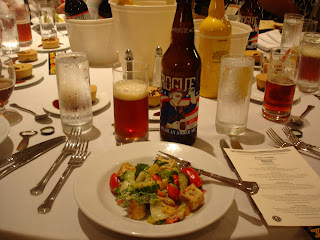
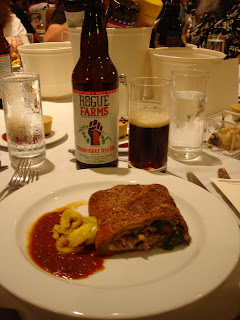
  • Beer Dinner and Awards Ceremony  - To culminate the weekend, we headed down to stand in  line to get seats at the dinner.  Most of the time, I hate lines, but this is the homebrewers conference so waiting really consisted of sampling beers and chatting it up with other homebrewers while waiting to get seats - not really a normal line-waiting atmosphere.  The dinner, sponsored by Rogue Ales and crafted by the Homebrewed Chef Sean Paxton, was pretty tasty.  The mustard dressing used for the salad was pretty young, and thus very spicey.  The amber ale paired with it really cut the heat and kept the salad refreshing.  The main course was stromboli based off of the famous philly sandwhich from Tony DiNic's containing roasted pork and broccoli rabe. It was good, but the portion sizes weren't even amongst our table.  Lastly, was the dessert.  A Philadelphia cream cheese cake, with hazelnut and crystal malt crust served with Rogue's hazelnut brown ale, and a side or raspberry oatmeal stout sauce.  By far the best part of the meal.  After the meal, the awards were announced.  A lite american lager took Best of Show, which was pretty surprising!  After the awards, we went to the social hall, where to my surprise the unconsumed entries from the final round were being handed out in a free-for-all!  I was able to grab a table with members of my BJCP tasting class and we sampled a bunch of really great beers!  I can only imagine what the NHC winners beer's tasted like!
First Course
First Course

Entree
Entree

Dessert
Dessert

Lastly, there were a bunch of games to win free stuff!  My buddy Jon of JB Brewing scored 2 free FastRacks, a Star Hill hat, a MoreBeer hoodie and I got the MoreBeer tshirt!  Not bad, heh?

Free Schwag
Free Schwag

Monday, May 13, 2013

Stewarding - My First BJCP Competition

In my 3+ year homebrew journey I have entered about 10 competitions.  After about 2 years in the hobby, I knew I wanted to become a beer judge.  I had heard from people on the forums getting into one of the Beer Judge Certification Program (BJCP) tests required a very proactive approach, and a long wait - they were right.  I first inquired last April (2013) to see if I could take the BJCP exam in Frederick, MD in February of 2013.  I was told that I could be placed 12th on the waitilist...wow!  Didn't look like I was going to be able to take the exam on that day.  I was then informed there would be another test in September of 2013 and did I want to be placed on the list to take it - YES!  Knowing I had a seat in the exam, I procrastinated studying til last month - right inside of 6 months.  I have been studying styles, their guidelines, and the brewing process on paper, but not as much hands-on, or should I say mouth-in, as I should be.  Cue the 21st annual Spirit of Free Beer Competition.

The Spirit of Free Beer competition is put on by he D.C. area homebrew group, BURP (Brewers United for Real Potables) around the beginning of May every year.  This year was the 21st installment of the competition, the third time I have entered, and the 1st time I have assisted as a steward.  This competition is 1 of 16  qualifiers for the Master Championship of Amateuer Brewers and pulls in some very qualified judges.

The competition was hosted by Mad Fox Brewing Company and I arrived bright and early to get complimentary breakfast -  caramel glazed donuts topped with bacon, and a fresh fruit tray was a great way to start the morning.  I then proceeded to sign in and talk to some fellow brewing enthusiasts.  A little after 8 the stewards were called and given preparatory information on how to assist the judges as well as the do's and don'ts.  A steward's job is to is make sure the judge's have all the necessary materials which consist of beers, cups, water, and bread, as well as to manage the scoresheets after each beer is evaluated.  Most judges will also allow the steward to get a sample of each entry to taste alongside the judges.

At 9am I was assigned to one of the 5 flights of Category 14 - IPA.  The first beer in our flight was definitely the best.  Although there were no horrible beers, each consecutive entry tended to have a few stylistic flaws.  Most common for our flight was a rather minimal hop character where beers tendy more to the malty side.  We had all American IPAs and these beers need to be hoppy to score well!  I was able to pick up some tricks for sensory evaluation of aromas.  After pouring a sample, hold your hand over glass for a few seconds, after which, immediately take in a deep sniff.  After sampling and filling out the scoresheets, the judges would share their scores and have a discussion about the beer.  For the most part, in this category, my judges scores were within 3 points of each other so no changes needed to be made.  Due to the number of flights, 1 to 2 beers from each flight was promoted to a mini best of show round.  I watched as 5 judges (one from each flight to avoid bias) debated over 10 IPAs to deem 1st, 2nd and 3rd places in the category.

(Mini BOS for IPAs - The Mad Fermentationist is seen on the right)

After all the mini BOS rounds were conducted it was time to break for lunch.  Mad Fox provided us with a keg of their Defender American Pale Ale (very tasty!) to wash down our pork bbq sandwhiches, pasta salad, cole slaw, and fresh mixed green salad.  Our sweet tooths were also indulged in the form of chocolate chip cookies, and brownies!  Around 1pm everyone reconvened to begin the afternoon session of judging where I was assigned to two new judges in Category 23- Specialty beers.

Specialty is a great category.  It allows for homebrewers to enter beers that don't fall into one of the other classical style categories.  It can provide combination styled beers like belgian ipa's, or highly hopped lagers (IPLs), smoked hefeweizens and the list goes on.  I really want to point out something to brewers who plan on entering this category: BE VERY DESCRIPTIVE.  It was really unfortunate that two of the entries in this flight only listed the 1-3 specialty malts they used in the beer.  The beers were very well made, with no flaws, but since the brewer's description associated no other style or parameter to base it off of, the judges had to give it a middle of the road score around a 30.  Had the brewer of these beers said something along the lines of "I brewed a Black IPA" they possibly could have had a best of show beer.  Other than the description miscues, this was a GREAT flight of 8 beers.  Every single beer was extremely drinkable and I (a very picky drinker) would have drank, and then ordered a second pint of any of them!

I assisted with the mini BOS for the Specialty Category and was able to snap a picture of all the beers.

(Mini BOS for Category 23 - Specialty Beers)

I stuck around to watch the overall Best of Show judging where the 1st place winner from every category was tasted by a panel of 5 judges, that is 23 different beers!  It was a little crazy and they slowly wittled things down to about 6 beers.  Some judges were very adamant about one of the beers being their favorite, but in the end there was compromise and a group decision was made on the top three.  A kolsch finished 1st, English Barleywine 2nd, and a Belgian Specialty took 3rd (think it was a dark strong?).

It was a long day, but a lot of fun!  I learned a great deal, and now have a better idea of how and what I need to study for my BJCP exam in September.

(Best of Show)

Before I sign off on this post, I want to applaud BURP Member Bob Rouse.  Bob created a system to streamline the scoresheet digitization and score processing.  Bob's program assosicates a barcode with each entrant.  The barcode is scanned first, followed by the scoresheets for an entrant.  The program reads the barcode and a pdf document is then created and appended, and the score uploaded to the competition software.  He used it for the first time in last years competition.  This year he improved upon it so it would then be able to automatically email all the entrants after the competition.  Bob's program allowed the results to be uploaded online minutes after the BOS judging finished.  Within 24 hours, all entrants had an email with one pdf, and all of their scoresheets... AMAZING!

Saturday, May 4, 2013

May the Fourth Beer with you


This year National Homebrew day celebrations falls on May 4th.  Shared only with another big holiday - Star Wars day, which coins the term "May the fourth, be with you."  National Homebrew day is actually May 7th, however, the closest Saturday surrounding it generally gets deemed as the Big Brew Day.  It's a day where homebrew clubs get together to brew high alcohol beers and Homebrew stores teach the craft of brewing to new people.  I unfortunately, in my 3 years of brewing have never been able to coordinate my schedule to sync up with this holiday.  One day, I will, but for now I will just have to obey princess leia and have a homebrew.

I did want to take this time to check in on and evaluate things based on my 2012-2013 brew schedule.  As you can see by the updated table below, I did not stick to my plan.  I did give myself the right to make changes, but  it really boils down to not being able to brew as often as I'd planned.  I started a new job in August and have had to work quite a bit more than I expected.  That, coupled with my lengthy commute lends to very little time for brewing. Another reason I have brewed less is because my consumption has been low.  I always talk about brewing smaller batches, but I never follow through...I always seem to want to fill the keg to the brim.  I might need to change my way of thinking and move back to 2-3 gallon batches or so.  Also, might need to start bottling some as well - I would say 75% of my homebrew gets consumed away from my kegerator.  This means more time cleaning, sanitizing, and filling bottles from the keg...if I just bottle I can alleviate all that!


The last two beers in the schedule are doubtful at this time, because my wife and I are in the process of buying a house!  This will be exciting as I should be revamping and creating a new brewery setup, however, it will delay wort production for a few months!

Competitions 

I got my scoresheets back from the regional rounds of NHC (National Homebrew Competition) and I will go into detail on those later, probably once I get feedback from all the other competitions I entered.  The other competitions entered are the Spirit of Free Beer and the Battle of the Bubbles.  I will be stewarding the Spirit of Free Beer as well, so be on the look out for some competition related posts in the future...Stay Tuned!

Sunday, April 28, 2013

Durstlöscher - German Pilsner


This is my second time brewing a lager.  I made a munich helles last year, which came out ok - there was just something off about it.  Given the simplicity of the ingredients in these styles, I knew I needed to focus more on my water.  I scoured forums and decided that using 50% distilled water for my mash and adding just a little bit of minerals to achieve an estimated 5.4 pH would produce a better beer.  Additionally, my parents bought me a stirplate for my birthday, which allowed me to more efficiently propogate the yeast for this batch.
(Filling the Fermenter with as much trub-free wort as possible)


Durstlöscher - German Pilsner Brewed On: February 18, 2013
Kegged On: 4/6/2013
Style: 2A -German Pilsner
Batch Size: 6 gallons (5 gal into fermenter)
Efficiency: 83%
OG: 1.048
FG: 1.009
IBU: 36 calculated (Rager) 
ABV: 5.1%
Yeast: WLP830 German Lager from Starter ~400 billion cells .  Fermented at 50° 

Grist Mashed at 147 for 60 minutes
97% - Weyermann Pilsner - 9.5 lbs
3% - Acidulated Malt - 4.5 oz

Hop Additions (90 minute boil)
.55 oz - Magnum - 60 min - 30 IBUs
.50 oz - Hallertau - 20 min - 6 IBUs
.50 oz - Hallertau - 0 min

Water Adjustments
Mash - 4 gallons Montgomery County, MD Water consisting of 50% distilled with 
3 grams Gypsum
2 grams CaCL
Sparge - Montgomery County, MD Water (treated with campden tablet)

This lager pours a nice deep straw color with a frothy white head.  The aroma is a strong, crisp and clean smell of malt with some slight yeast character - touch of sulfur.  It has medium body with medium carbonation.  The beer really showcases the continental pilsner malt, and washing it over your tongue you can pick up a grainy sweetness.  The sweetness is really more "maltiness" which is a compliment to the extreme crispness and lack of esters left by the lager yeast.  The firm, but pleasant bitterness from the hallertau hops helps the beer finish dry.  A real thirst quencher perfect for spring!

I left this one in the fermenter a little longer than I would have liked due to my keg issues.  It could have a little more fresh hop character, but overall it is pretty tasty.  Being my second lager, I am greatly pleased with the outcome.  Two big differences between this lager and my first. 1) I used liquid yeast this time, and did a double step starter on my stir plate (used dry the first time) 2) I cut my mash water with 50% distilled water. After writing my tasting notes I decided to go to the BJCP guidelines and see how I was doing.  Pretty much falls right in line with the guidelines - I just entered this in two competitions, so hopefully my palate is tasting accurately!  

Saturday, March 23, 2013

Kegging - The Not-So Awesome Side of Packaging

Browse the homebrew forums in their "Bottling/Kegging" section and you will notice a lot of reoccurring questions pop up.  Many of those questions revolve around a fairly new homebrewer asking questions about bottle carbonation.  A few people will respond with well constructed and helpful advise...then, there is always one wise guy who posts "Just keg and you don't have to worry about it!"  While that may be true, there are quite a few frustrations that can accompany the pleasantries of kegging.

We know the benefits of kegging our homebrew:


  • Clean, Sanitize and fill just one container
  • Fine tune your carbonation level
  • Force carbonate your beer quickly (<24 hours if necessary)
  • Draft homebrew is awesome and it allows you to sample less than 12 ounces at a time
  • You cold condition and carbonate at the same time, producing a larger quantity of clear beer sooner.

Now let me explain some of my problems I have had while kegging:


(Velcro Picnic Tap)
  • CO2 Leak:  I avoided this for over a year!  I decided to upgrade my dual body regulator with 2 wye splitters (allowing myself the ability to carbonate and serve 4 beers rather than 2) and I guess I didn't find the leaks...killed 2 tanks worth of CO2.  Not a huge deal, but thats about $40 down the drain right there.  Solution: My problem was I didn't check for leaks at 30psi, I did it at 10psi.  Make sure to check for leaks at a higher pressure so they will be more visible. Use soapy water or star san for visibility.
  • Unsecured Lines:  I started out with the plastic "Picnic Taps" to save some scratch until I could upgrade to perlick forward-seal faucets.  I learned the hard way that picnic lines lose flexibility the colder they become.  This led to my picnic tap falling and opening itself, making a huge mess! Solution: Secure your lines.  I purchased some velcrow tape and fastened it around my tap and secured it to the side of the fridge.
(Foamy Beer!)
  • Overcarbed Beer:  Remember the benefit of quickly carbing beer from above?  Well what if you do to much too quickly?  While it is fixable, an overcarbed keg is a nuisance.  I recently had this happen while trying to force carb some beer for bottling for NHC 2013.  Solution:  Vent keg daily.  You can pull the keg out of your keggerator and leave it a room temp (higher temp = less CO2 in solution which means you venting is more effective). 
  • Equipment Maintenance:  You are always needing to replace O-rings, or other items.  I just recently had a HUGE SNAFU because I bent a poppet valve on one of my kegs.  After a trying a bunch of things, including purchasing a universal poppet which didn't seal fully (I need a long-legged poppet), I find out there are 3 different types of poppets for pin lock kegs (6 types overall?)!  Solution: First off, be very carefully tightening down your keg posts - I didn't notice the poppet pin was being obstructed by the post itself and ended up bending it AND the flange on my dip tube.  Second, make sure you know which type of kegs you have and have a backup plan - either spare kegs, poppets, o-rings or All three!  (just purchased bulk o-rings from Orings and More - highly recommend!)
(Different poppet types)

  • Bottling:  Wait! I thought we are talking kegging, right?  Well yes, but even though you keg your beer  you will eventually have to bottle some of it for competitions or to give to your friends and family that can't make it to your tap.  Solution:  You can create a cheap bottle filler (execution here) or buy a Blichmann Beer gun.  Either way, you are now doing twice as much work as you originally were just bottling!
So beware!  Kegging comes with its own set of problems.  Spending hours trying to find leaks, or cleaning up gallons of beer from the garage floor may make that hour of bottling and 3 weeks waiting for carbonation to be achieved seem just a little better.  But at the end of the day, nothing beats pulling a pint from one of the 3 taps below!

(Shegogue Brew's 3 Perlick Taps)

Friday, March 15, 2013

Wrong Coast - IPA

Its been a while since I have brewed anything hoppy, almost a half a year to be exact.  My taste buds have been asking for the hops, and I finally decided to indulge them.  I have been reading up a lot about hoppy beers over at fellow blogger Scott's site: Bertus Brewery.  Scott has some of the best info out there on how to make a great IPA and I used that info to formulate the recipe below.

The grain bill is based on principals made popular for pale ales by Firestone Walker Brewmaster Matt Brynildson.  Mostly 2-row or pale ale malt with some munich and carapils.  This will provide a solid canvas which I then showered with hops - close to 10 ounces for a 5-6gal batch.  My wife bought me 3lbs of hops for my birthday - 1lb each of Simcoe, Cascade, and Citra.  I decided to hop this beer with a classic IPA combo, Simcoe and Cascade.

(Hops for Wrong Coast IPA)
Living on the East coast, my first IPA experience was Dogfish Head 60 minute IPA - great beer.  Since homebrewing and becoming a more educated craft beer consumer, I have come to enjoy the hop blasting lupulin bombs from the west coast.  This beer is more to that style, but from an east coast brewer.  I therefore have deemed this beer "Wrong Coast" and adulterated the U.S. Map in the logo.


Brewed On: January 26, 2013 (My birthday and 3 year brewing anniversary)
Kegged On: February 18, 2013
Style: 14B -American IPA
Batch Size: 6 gallons (5 gal into fermenter)
Efficiency: 75%
OG: 1.066
FG: 1.012
IBU: 63 calculated (Rager) 
ABV: 7%
Yeast: Safale S-05 American Ale Yeast Slurry from Porter.  Fermented at 62° for 3 days then rise and held at 67°


Grist Mashed at 151 for 70 minutes
80% - Great Western Pale Ale Malt - 11.5 lbs
15% - Briess Munich - 2 lbs
5%  - Briess Carapils - 12 oz

Hop Additions
.7 oz - Magnum - 60 min - 38 IBUs
1 oz - Cascade - 20 min - 8 IBUs
1 oz - Simcoe - 20 min -17 IBUs
1.5 oz - Cascade - 0 min 
1.5 oz - Simcoe - 0 min
Dry Hop Addtions, equal parts Simcoe and Cascade
1st Addition - 2 oz - 8 days
2nd Addition - 2 oz - 4 days (added to primary 4 days after 1st addition)

Water Adjustments
Montgomery County, MD Water - 1/2 Campden Tablet for all brewing water
12 grams gypsum to mash water
2 oz acid malt

Tasting Notes
The beer has a nice white head and a grainy gold color, which due to some kegging issues is still fairly hazy - shows nice lacing.  It smells of sweet citrus and grapefruit and overall fruity dominance backed up by subtle maltiness from the munich. It currently has medium-to-low carbonation (keg issues) which contributes a creamy mouthfeel that finishes slightly bitter and dry with a slight alcohol warmth at the end. Fresh american hop character sounds its trumpet throughout.  Delicious :)

The only real knock on this bitter is that I don't think the bitterness is bold enough.  In the future I will increase the bittering charge, or lower the total malt a bit to decrease the alcohol, which should enhance the bitterness.